Showing posts with label D-I-Whyyyy did I think this was a good idea?. Show all posts

My Private Shame: Let Me Show You It

Yeah, I'm talking embarrassing home decor, or lack thereof, again. Buckle up, for this one's a doozy.

As I have mentioned, we live in Northern Virginia, where townhomes and condos are ubiquitous, developments are thrown up overnight, and homes built in the last 25 years or so are utterly devoid of character. We live in one of these modern (read: "character free") townhomes, which Mark had purchased about a month before we met. (So close! I was so close to having input into where we would live!) I was a renter (of an utterly charming, WWII era townhouse in a neighborhood tucked into a virtual arboretum minutes outside of DC), so although it broke my heart, I had to do the moving when we became WHORES!.

We had some minor growing pains upon moving in, mostly because we had mesh our styles, and well, Mark needed some help. He thought booze was an acceptable decorating theme, for example. He also has appallingly bad taste in art, as you'll see. It's ok, though. We have done a lot of work together to make the house more "us," installing gorgeous hardwood* floors, gutting the kitchen and bathrooms, and by Mark trusting me more when it comes to decorating choices. It's not perfect by any stretch, but we've made a lot of progress.

That said, talking Mark into redecorating that does not involve construction still involves the hard sell, and the non-public areas of the house are in need of some HELP. We covered my bedroom, which, still looks much the same. I am pretty sure I want to move ahead with the curtains, as soon as the sewing motivation strikes, and I found this quilt and shams, which I think would be fresh and cute. The guest room is as it will be for the foreseeable future:
I'm not thrilled with the bed frame, but Mark made it, so it stays. Also not pleased that we have the bed up on risers so that we can fit his ancient, saggy mattress under the bed. I keep telling him I'm not leaving and taking my mattresses, but alas. Overall, though, it's fluffy and airy and girly, as I generally like guest rooms to be. Makes it feel clean and comfy, maybe?
The den of burning shame, however, is just next door to my fluffy, girly guest room, and it is a horrible cluttered hell. Mark has always used this room as an office, filled to the brim with a giant particle board desk, and computers and wires and clutter. (OH MY.) It got even more crowded and horrible when we had to move my cute little white desk in to share the room. We dismantled much of the room when we were having the windows replaced, and in the window replacement process, the installers managed to break a crucial piece of Mark's desk. (I may or may not have wanted to offer them my hypothetical firstborn in gratitude.) We were able to clear out the hulking horror of a desk, but were left with the detritus it had contained. It's... there are no words:
CRAP EVERYWHERE.
Massive, hideous chair.
AGHHH
HALP MEEEEE.
That there? That is the attic door that has been on the top of Mark's To Do list for the last year and a half, while we have been living with a gaping hole in my closet ceiling. It's super fun when it's 95 degrees out and 150 in the attic.
My cute little desk, covered in crap for two.
 Oh, and that terrible taste in art I mentioned earlier? BEHOLD:
 
 
Yeeeeah. These used to hang in the living room and dining room. Can you even imagine? I mean, there are no words to adequately describe how awful these things are. I like to call it "Bad Vegas Art." (Actually, that's false; I would prefer to call it "SOLD TO THE HIGHEST BIDDER.") Despite this, I actually attempted to decorate around them in thanks for being able to move them out of the part of the house people regularly see. I bought this fabric:
and even spray painted the lamps and desk accessories in keeping with the green/red olive/pimento theme:
WIFE OF THE DAMN YEAR
Despite my efforts, I have been unable to light a fire under Mark's ass to get rid of the clutter. In fact, it has only gotten worse, as it became the repository for crapola during the last bathroom reno, and it looks so terrible that whenever we lack a good place to put something, it seems to get shoved in there while I keep sighing and closing the door. However, I work from home, and as I have been getting a little busier, I have begun to need a proper office. I end up sitting on the couch or hunched over the kitchen counter, neither of which is helpful for my productivity.

SO. First things first -- this room needs to be cleaned out. Mark has some separation anxiety when it comes to computers/wires/clutter (OH MY), so I am anticipating that more junk than I would like will end up in the attic, but if that's what it takes, I'll deal. Once that is done, I am planning to turn it into a bright, cheery space. Unfortunately the ceilings in our bedrooms are all high and sloping, so I can't paint the room myself. I don't want to hire someone, so I am going to have to work with the bland beige walls. I found a really vibrant print that I LOVE, and its colors are my jumping off point. I'm thinking something like this:
I have the PB desk already -- it's just one of the three drawer cabinets with a small desktop. I like the idea of a smaller profile, white leather(ette?) desk chair. Comfy, but not overpowering for the room. I would like to leave room for a daybed should we ever need this room to do double duty as a guest room, but for now, I think I will just enjoy the openness of the room not being crowded with furniture. As for fabrics, I already have some of the Waverly Cross Section fabric, so I need to work that in somehow. I think the best way might be in pillows to coordinate with the window treatment. The room has a big double window; I would like to make a cornice board to give some height (and because it's way easier than curtains) and either go with white wood blinds or white sheers underneath. I think the pink and white canvas canopy stripe is cute and clean for the cornice board, and bonus, it's CHEAP. God help me, I am thinking green grosgrain ribbon to cover the seams and to coordinate with the cross section fabric. (You can take the girl out of New England, you know?) Let's hope the art pulls everything together so that it doesn't end up looking like a little girl's room. The plaid silk was an early idea from a renovation I saw in Southern Living, but eh, I don't think it's meant to be. Overall, I think this will be easy to achieve, once I can convince Mark it's worthwhile.

What do you think? Too much pink? Too ... girly?

*Brazilian cherry -- stunning, but the color darkens significantly over time, and it turns out that dark floors are a total bitch to keep clean.

Cooking With Botox! (Part 2)

Previously on Cooking With Botox!, we covered the amazing fresh tomato sauce and mentioned that we canned it, mostly successfully.* I took lots of photos of the sauce making process, even edited them a little to improve my craptastic photography skills, and then dropped the ball completely when it came to documenting the canning process. Of course I did.

But! In an effort to document everything in case I ever decide to try this again (or, you know, just to prove that I actually did this once in my life), I made some jam yesterday and canned that too. Yes, I realize -- my marbles, I have lost them.

Onward! To nectarine jam! I love peaches most of all, but nectarines are delicious too, and as was pointed out in Canning for a New Generation, you don't have to peel nectarines. Sign me up!

I pretty much followed the recipe provided in Canning for a New Generation, which called for 4 lbs. of nectarines, 1 1/2 cups of sugar, and 3 tbsps of lemon juice. The notes mentioned how delicious throwing in some vanilla beans can be, so in went a half of a bean, split. Also, to make this as peach pie like as possible, I threw in a couple of shakes of cinnamon. It simmered for an hour or so, and looked and smelled AMAZING at this point.


Good, right? Here's the thing: it never really gelled, which is totally my fault. The recipe didn't call for pectin, but I bought it just in case, and then promptly forgot all about it. GENIUS. Anyway, it's more of a nectarine syrup with fruit. Tasty, sure, but I wouldn't necessarily spread it on toast. Moving on...

Ok! Time to can! So, did I ever tell you about when we renovated our kitchen? I desperately wanted to upgrade to a gas stove, but the gas line enters our house in the back, services the laundry and HVAC and dead ends there. The cheapest estimate we got to run a gas line into the kitchen was $4200, and that did not include repairing any of the drywall that they would be ripping out along the length of our family room ceiling, into the foyer, up the stairwell, and into the kitchen. HAAA, NO. As a result, I have a ceramic topped electric stove, which works well enough in general, but happens to be the one surface with which the cheap canning pots are not compatible. I was certainly not shelling out for a more expensive canner, therefore, this is my setup:
Elvis, is that you? "In the ghet-toooo..."
I was dubious, and it took awhile to come to a full, rolling boil, but it worked. (JOY.) So here's what I did:
I assembled clean jars in the canning rack...
...and dropped them into the simmering water bath for 10 minutes to sterilize.
At the same time, the lids and rings simmered on the stove.
Time to fill the jars. They were pretty tiny, so the funnel I used for the tomato sauce seemed a little much; I just tried to ladle carefully. Next, I used a wooden skewer to break up any air bubbles. (This seems to be the only thing I didn't photograph.)
I used a clean towel to wipe the rim of the jar, because apparently the food residue can prevent the jars from sealing.
Carefully fish a lid out of the hot water, trying to avoid sticking your finger in there too. Not that I did this myself, noooo.
Gently drop the lid onto the jar, making sure the gummy seal is positioned properly.
Fish a ring out of the hot water and drop it onto the jar, trying not to shove the lid out of place. Tighten the ring loosely, just as much as you can do using only your fingers.
Arrange the filled jars on the rack and gently lower the rack into the water.
Cover the pot and let it come to a rolling boil before you begin timing the processing. The recipe called for 5 minutes, but let's be honest, it was probably more like seven over here. (See: fear of killing loved ones with my cooking.)
Using jar lifters, remove the jars to a clean towel. Ideally, they would sit untouched for 24 hours, but here in my, um, let's call it an "outdoor kitchen," I used a towel covered baking sheet so that I could move them back into the house.
Luckily, within minutes of pulling the jars from the water bath, I was treated to a chorus of popping lids, sealing themselves onto all 12 jars. Hooray! We're going to have to start eating more blue cheese, biscuits, and other things you'd put syrup-y fruit on.

*You know, for now. We'll see if anyone dies after eating it.

Cooking With Botox! (Part 1)

You guys, I seem to have lost my mind and all semblance of youth: I HAVE TAUGHT MYSELF HOW TO CAN THINGS.

It all started so innocently. A couple of years ago, I started tossing all of my plastic containers in favor of glass. I started buying mason jars for storage of leftovers, freezer items, etc., because they were so much cheaper than my beloved Glasslock containers. Mark started talking about the strawberry jam his mother used to make. Then I started noticing a huge uptick in canning supply sales during my shifts at the store. Finally, on one of my trips to the Cape, my mom made tomato salad with Cape tomatoes, which are spectacular. I dreamed of loading up the car with them and making sauce at home, squirreling it away for dark winter nights. On my next trip up, I did indeed load up with tomatoes, and I did make the most amazing fresh tomato sauce, but I took the easy road (i.e. my usual road) and stuck the jars in the freezer. At that point, though, I resolved to figure this canning thing out, botulism be damned. I bought "Canning for a New Generation" and the Ball Blue Book (tell me my husband is not the only one to snicker at that title).

Between the two books, I was feeling pretty confident that I could figure it out, which was pretty convenient, as my sister called the next day to see if I wanted to split a 25 lb. box of tomato seconds from the farm share that delivers to her office. I said yes and made her promise to do the canning with me, and that was it -- no turning back.

My sister came over on Saturday morning and we got to work. We were working with (unbelievably delicious) Roma tomatoes, and we wanted to do a roasted tomato sauce. We decided to cut the tomatoes into quarters or sixths, depending upon the size, and toss them onto baking sheets with thin wedges of sweet onion and smashed garlic cloves. We kept the seasonings simple -- salt, pepper, and a drizzle of really good olive oil -- and roasted at 400 until everything was caramelized and delicious looking. (Oh my GOD, I wish you all could have smelled my house that day. INSANE.)
Core, slice, slice, slice, slice, slice...
...scoooop and transfer...
...season and grease 'em...
(the first of maaaany batches)
...and then roast. Can you smell this? HEAVEN.
Please try to refrain from eating them straight off the sheet. (This will be harder than you anticipate.)
Once the tomatoes were roasted, we scooped them into a large stockpot. We were staring at the baking sheets, trying to decide whether they were cool enough to lick the caramelized juices right off of them, when it hit us: 
Deglaze that shit, yo.
I grabbed a bottle of wine from the fridge and we threw the baking sheets right on the stove. Each sheet got a nice splash of wine, we scraped up all of the deliciousness, and then into the pot of tomatoes it went. Then it was time to blend:
We used an immersion blender and it was perfect -- quick and easy, with almost no clean up. We blended as we added each batch and it resulted in a really nice, smooth texture. It was so delicious that we really had no choice other than to stop for a lunch break:
OMG
Now, we had originally planned to get the whole project done in one day, but life kind of got in the way. My brother in law had made plans for the afternoon, so my sister had a hard stop time of 2:45. We managed to get the sauce completed and started to clean up the spectacular disaster that was my kitchen:
The Aftermath

This was the end of Day 1, though, and being the appallingly bad documentarian I am, I forgot to pack up the camera for canning day. I know, right? USELESS. Here's what we did in a quick run down:
  • Simmered the sauce so it would be hot going into the jars.
  • Brought the canning pot and a small saucepan to a 180 degree simmer. The jars went into the canner and the lids/rings went into the saucepan for 10 minutes to sterilize.
  • We pulled the jars out of the water bath and lined them up on a clean towel. Each jar got a 1/4 tsp. scoop of citric acid powder.
  • Using a large funnel, we ladled the sauce into each jar, leaving 1/2" headroom. 
  • Each jar got a thorough swiping with a wooden skewer to break up any air bubbles and stir up the citric acid, and the rim of each jar was wiped with a clean cloth.
  • Using the little magnet wand tool, we fished the lids out of the water bath and applied them to the tops of each jar. Next we fished out the rings and closed them gently to hold the lids in place. 
  • Finally, the jars were loaded into the canning rack and gently lowered into the water bath. Once the water came back up to a violently rolling boil, we started timing the processing. The tomato sauce recipes called for 35 minutes, but we left them for closer to 40 (better safe than sorry?).
11 out of 12 jars sealed, which is a pretty solid first effort, in my opinion. And! It went so well, in fact, that I decided to try my hand at jam, and I even managed to capture both the cooking AND the canning phases this time. Spoiler alert: the jam did not thicken as I had anticipated, but it's tasty. I'm thinking it might be nice in place of honey on biscuits or spooned over a really piquant blue cheese.
I'll report back soon.

Um, I was under the impression that the clothes would be washing themselves.

The laundry room, it is done! Well, done-ish. We still have to figure out how to conceal the water lines, but it is already so drastically improved that I don't actually care all that much about the visible plumbing at this point. I have a couple of tweaks to make staging-wise, but the majority of the work (and surprise! plumbing repairs) is d-o-n-e, DONE!

As a refresher, we started with this:
Not pictured: festive spiderweb bunting, augmented with bits of dryer fluff, draping each wall.
Gross, right? It was always messy, there was nowhere near enough storage on that one overcrowded shelf, and the fluorescent lighting, oh how it buuuurns.

We took a weekend detour through Adventures in Accidental Plumbing Land:
"Seriously, babe, it really wasn't my fault!"
Finally, after lots (LOTS) of effort on Mark's part, and some Pinterest-hunting and painting on mine, we now are working with this:
AHHHHH!
Not perfect, but so much better, right? I mean, the fact that the machines are the same height and sitting perfectly side by side is enough to make me happy. Add in the ridiculous amounts of storage and functionality we added to the space, and I am downright giddy.

Let's take a tour, shall we?
The first purchase and inspiration for the room.
 I, along with everyone else out there, absolutely LOVE the vintage style fixtures at Schoolhouse Electric. SO gorgeous, right? However, like many of us, I have neither the budget nor the desire for $170 worth of lighting fixture in my laundry closet. (Those awesome Schoolhouse fixtures? The fixtures and the shades are sold separately. Haaaaaa, NO.) However, while trolling the lighting aisles at my local Lowe's, I happened upon this guy:
Um, hello, same look for $25? YES, PLEASE.

Isn't she pretty? SO MUCH BETTER than the fluorescent strip.
A teeny trash can for dryer lint and Mark's socks with gigantic holes in them, as well as a pretty Purell dispenser.

I have these canisters (Crate & Barrel Outlet!) in my kitchen also, and I love them. That empty one will eventually hold clothespins, once I can get my hands on some. Grocery stores, Target -- no dice. I'll have to try Bed Bath & Beyond.
Love the lovely storage. The basket on the middle shelf has quick mending tools, lint roller, color catcher sheets, etc.

The cabinet right above the washer holds the everyday cleaning supplies, in smaller sizes for easy dispensing.
The giant refills and stain fighting arsenal live in the big center cabinet. (The last dregs of my youth just up and died when I admitted to 1.) owning a stain fighting arsenal, and 2.) my excitement over its new home. Am officially OLD.)
The only thing we have left to do is conceal the plumbing, and I'm not entirely sure how difficult this will be. I was thinking that we could cut a panel of beadboard to fit and hang it from some hooks attached to the underside of the cabinet. However, the doors of the center cabinet are beadboard-y (Ikea style), so I am concerned about lining up the grooves in the doors and on the hanging panel. The second concern is color. Ikea white is sort of off-white-ish, so I have a feeling finding the right paint could be an ENORMOUS pain in the tuchis. This may just have to be good enough.

And, aside from the fact that I still have to use this room to, you know, do the laundry, I think good enough is looking pretty damn good.

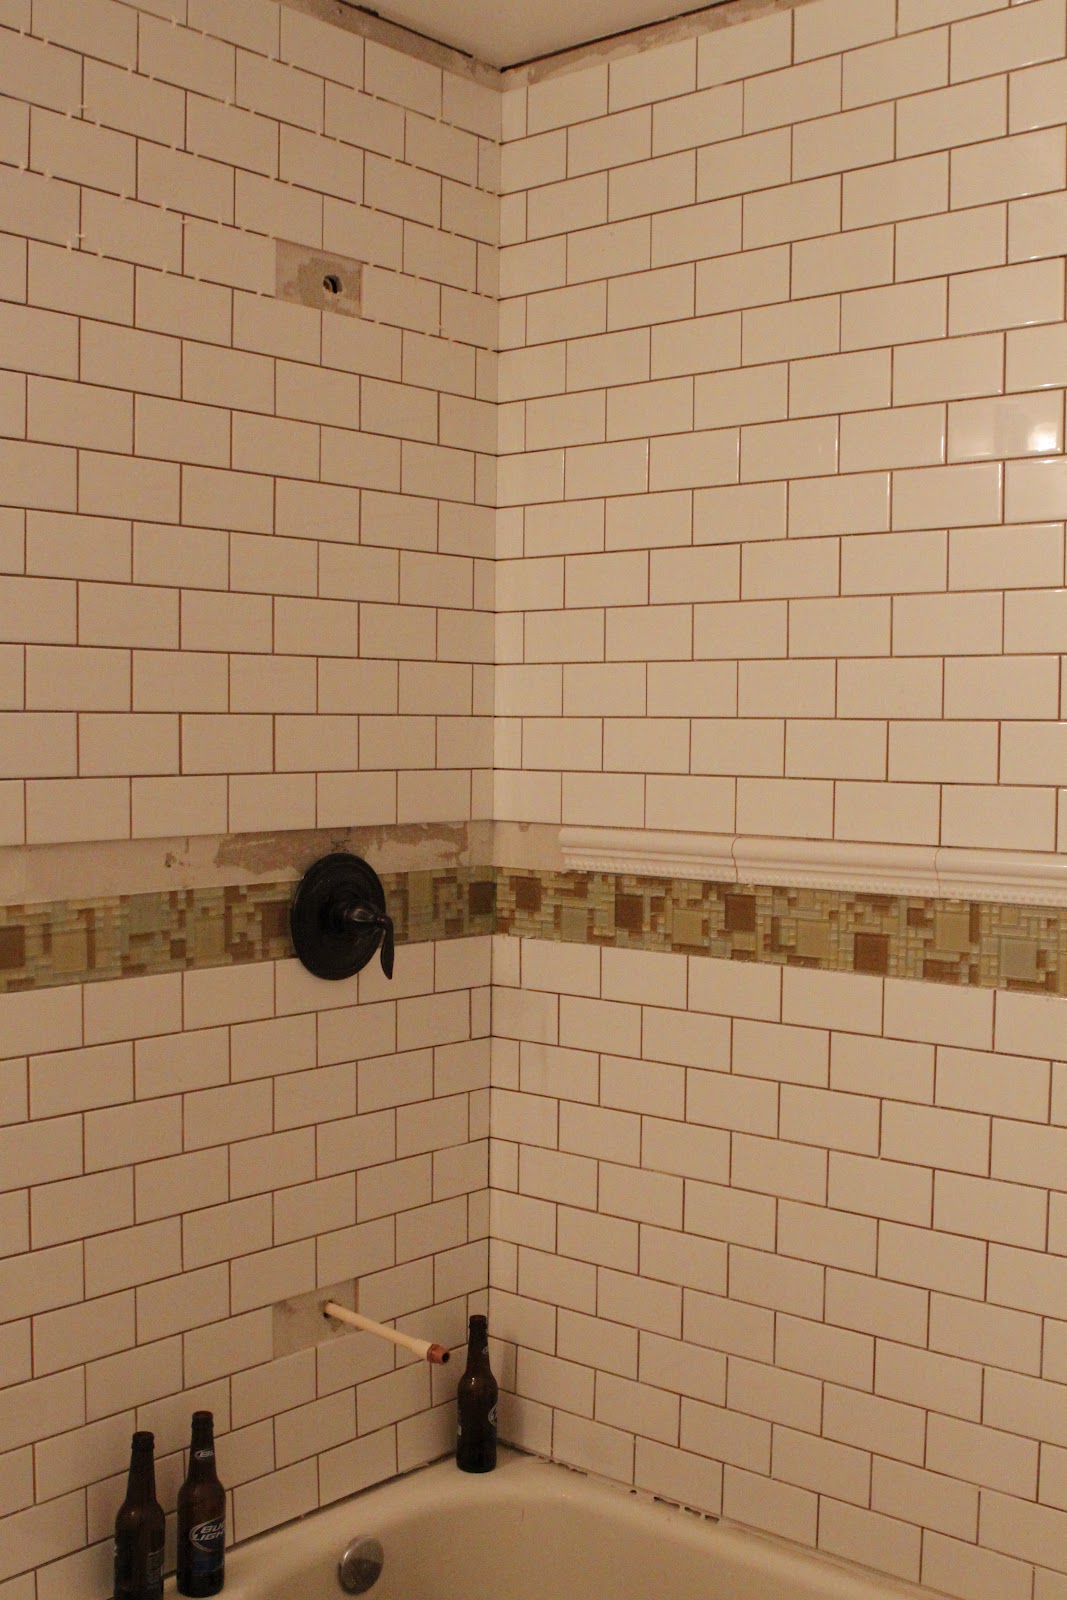
PS -- After a year of living construction-free, the laundry room seems to have opened the home improvement floodgates. We just gutted our guest bath. *Gulp* It is an unholy mess right now, but I think it will look great once it's done. Sneak preview:
This bathroom is brought to you by Bud Light.


↑
up